Add custom data (metafields) to different product variants. You can show different types of fields (text, url, etc.) for different product variants.
Table of Contents
- Step 1: Understanding Variant Metafields
- Step 2: Adding Values to Product Variant Metafields
- Step 3: Modifying the Product Page Code
- Step 4: Updating JavaScript for Variant Handling
- Step 5: Adding Custom CSS
- Step 6: Displaying Variant-Specific Pop-ups
- Step 7: Implementing the Pop-up Code
- Step 8: Finalizing the Pop-up Styling
- Step 9: Reviewing and Testing
Step 1: Add “Custom data” (Metafields) for Variants
Adding metafields to variants in Shopify allows you to present specific data related to each variant on your product page. This customization is crucial for products with multiple variations, each having unique attributes.
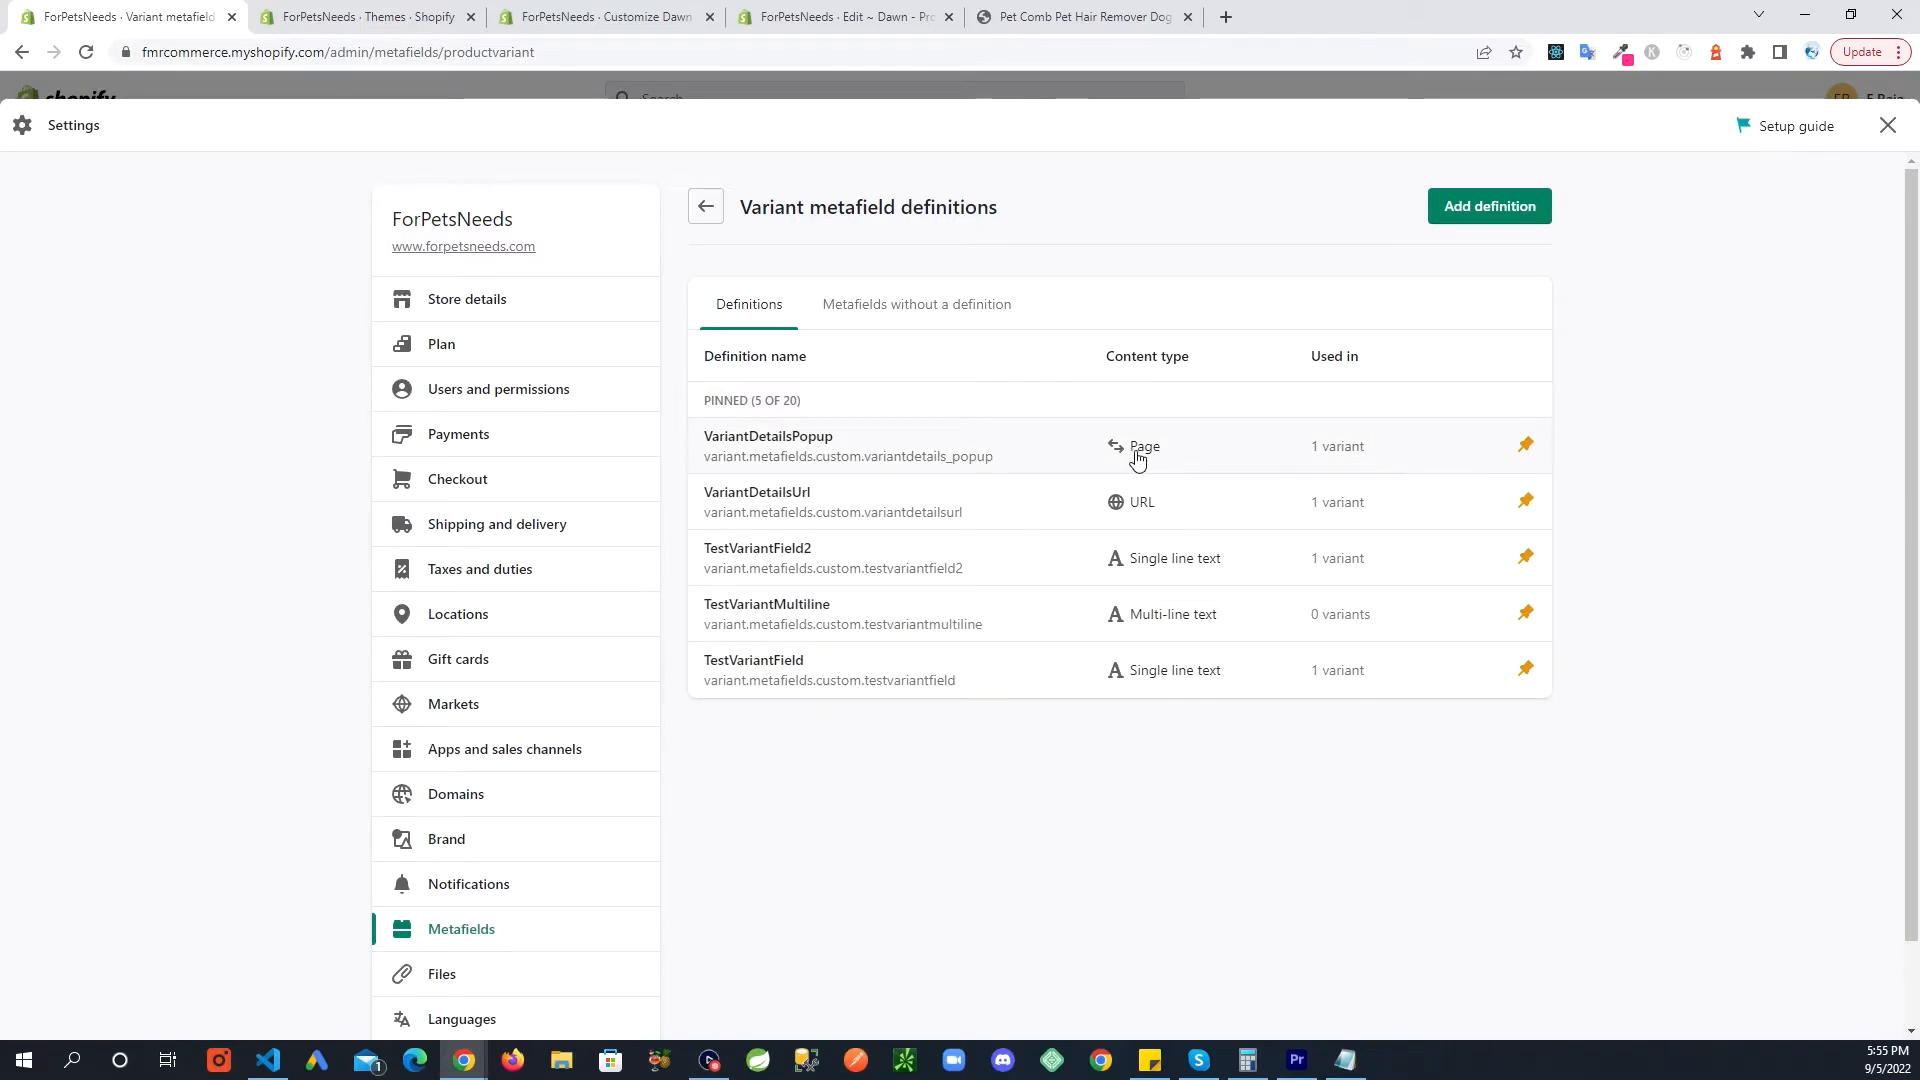
So if you are looking to add some extra data to your variants you will go to Settings>Custom data and add all the fields.
Step 2: Adding Values to Product Variant Metafields
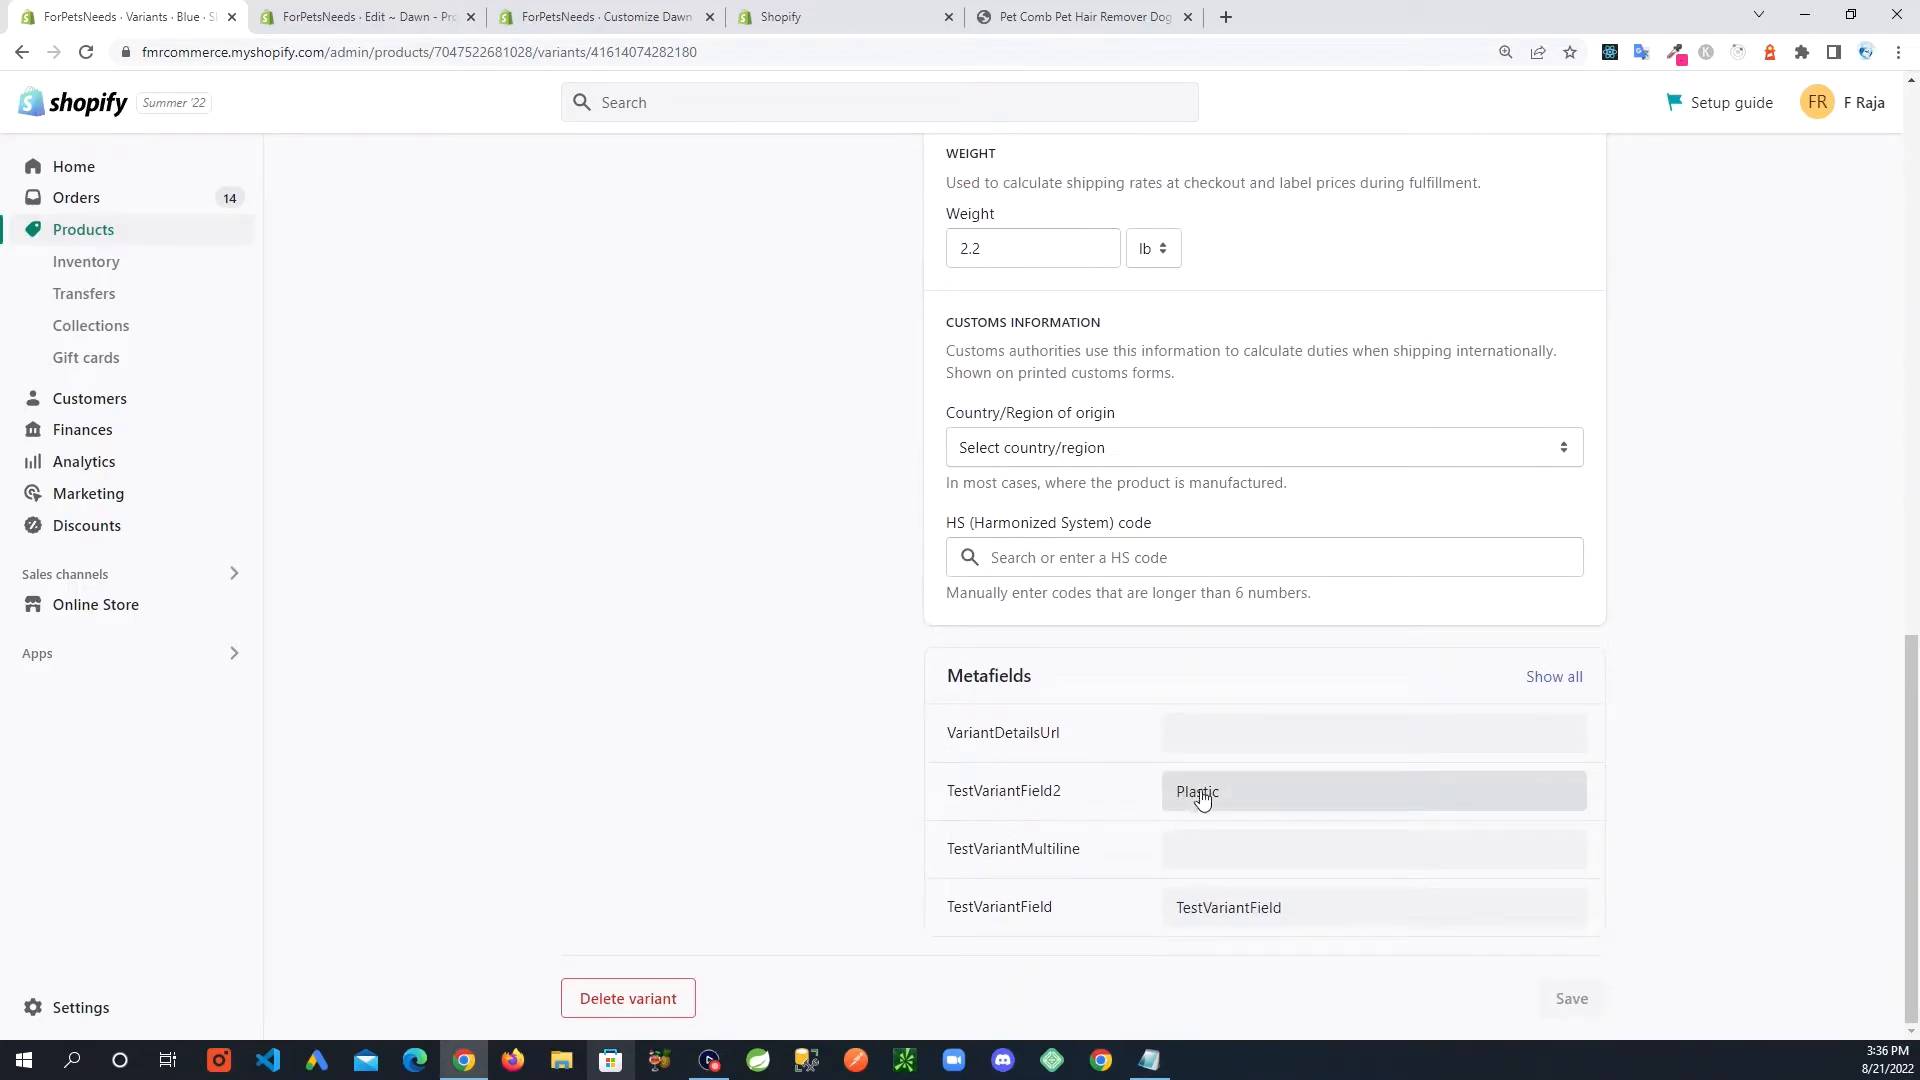
Then you will go to the product variant where you want to show this custom data, e.g the blue variant. Scroll down to see the metafields section. Here you will see all fields that you added earlier.
Repeat this process for other variants as needed. Remember, each variant can have different data that you want to display.
Step 3: Modifying the Product Page Code
Next, we need to update the product page code to display the variant metafields. Open the main-product.liquid file. Here, we’ll add the custom code below to handle the display of variant metafields.
In my example I’m using an older version of Dawn theme so don’t focus on the line number. Key here is to look for the {%- when ‘variant_picker’ -%} and inside you will find {%- unless product.has_only_default_variant -%}, bunch of code and then {%- endunless -%}, so after this “endunless” is where you will add the code. It is also possible that if you are using a newer version of Dawn Theme or a different theme altogehter, inside { %- when ‘variant_picker’ -%} you find some code starting with {% render ‘product-variant-picker’…. This means that all that code for variants is in a different file, so look for exactly what is next to the render e.g product-variant-picker.liquid. Now when you go into that file you should see the similar code related to {% unless -%} and {%- endunless -%}.
This code will check for the presence of metafield values and display them accordingly. Ensure you modify the fields to match your metafields, such as material, care instructions, etc.
<!-- Custom Variant Metafield Code -->
{% for variant in product.variants %}

  {% if variant.metafields.custom.testvariantfield2 %}

    Material: {{ variant.metafields.custom.testvariantfield2 }}

  {% endif %}

  {% if variant.metafields.custom.testvariantfield %}

    Care Instructions: {{ variant.metafields.custom.testvariantfield }}

  {% endif %}

  {% if variant.metafields.custom.variantdetailsurl != blank %}

    See more details.

  {% endif %}

{% endfor %}
<!--/ Custom Variant Metafield Code -->
Step 4: Updating JavaScript for Variant Handling
To ensure the variant metafields update dynamically, we’ll need to modify the global.js file located in the assets folder. Navigate to around line 771 and add a custom function for updating options.
!important: Your line can be different based on your theme and version, as long as you are adding this function inside the class “VariantSelects” you should be fine.
This ensures the variant metafields update correctly when a user selects a different variant.
Step 5: Adding Custom CSS
To style the variant metafields, we’ll add some custom CSS. Open the section-main-product.css file in the assets folder and scroll to the bottom. Add the necessary CSS to style the metafields display.
Save your changes and refresh the product page to see the updated styling.
.variant__description {
  display:none;
}
Step 6: Displaying Variant-Specific Pop-ups
Now, let’s add a feature to display a pop-up with more details for specific variants. This pop-up will only show when a variant has additional details specified in a metafield.
First, navigate to the metafields area and add a new field for the variant. Name it appropriately and set the type to page. This field will link to the page content displayed in the pop-up.
Step 7: Implementing the Pop-up Code
Next, add the necessary code to display the pop-up in the main-product.liquid file. This code will handle the modal display and content fetching based on the variant metafield value.
Ensure you copy the code correctly and save your changes. This code will dynamically show the pop-up when a variant with additional details is selected.
<!-- Custom VariantModal -->

  <modal-dialog id="PopupModal-{{ variant.id }}" class="product-popup-modal" >
    <div role="dialog" aria-label="{{ block.settings.text }}" aria-modal="true" class="product-popup-modal__content" tabindex="-1">
                        <button id="ModalClose-{{ variant.id }}" type="button" class="product-popup-modal__toggle" aria-label="{{ 'accessibility.close' | t }}">{% render 'icon-close' %}</button>
                      <div class="product-popup-modal__content-info">
                        <h1 class="h2">{{  variant.metafields.custom.variantdetails_popup.value.title }}</h1>
                        {{  variant.metafields.custom.variantdetails_popup.value.content }}
                      </div>
                    </div>
                  </modal-dialog>
                  <modal-opener  data-modal="#PopupModal-{{ variant.id }}" data-variant-id="{{variant.id}}" class="product-popup-  modal__opener no-js-hidden quick-add-hidden variant"
                    {% if product.selected_or_first_available_variant.id == variant.id %} style="display: block;" {% endif %}
                    >
                     {% if variant.metafields.custom.variantdetails_popup != blank %}
                      <button id="ProductPopup-variant" data-variant-id="{{variant.id}}" class="product-popup-modal__button link" type="button" aria-haspopup="dialog">Popup!!</button>
                    {% endif %}
                  </modal-opener>
<!--/ Custom VariantModal -->
Step 8: Finalizing the Pop-up Styling
To style the pop-up, add some custom CSS to the section-main-product.css file. This CSS will ensure the pop-up looks consistent with the rest of your product page design.
.product-popup-modal__opener.variant {
  display:none;
}

// Below is not in the video but if you add this, it will reduce the margin between fields.
.variant__description p {
  margin: 0;
}
Save your changes and test the pop-up functionality by selecting a variant with additional details.
Step 9: Reviewing and Testing
Finally, review your changes and test the product page. Ensure that the variant metafields display correctly and the pop-up shows for the appropriate variants.
Navigate to your product page, select different variants, and verify that the metafields and pop-ups work as expected.
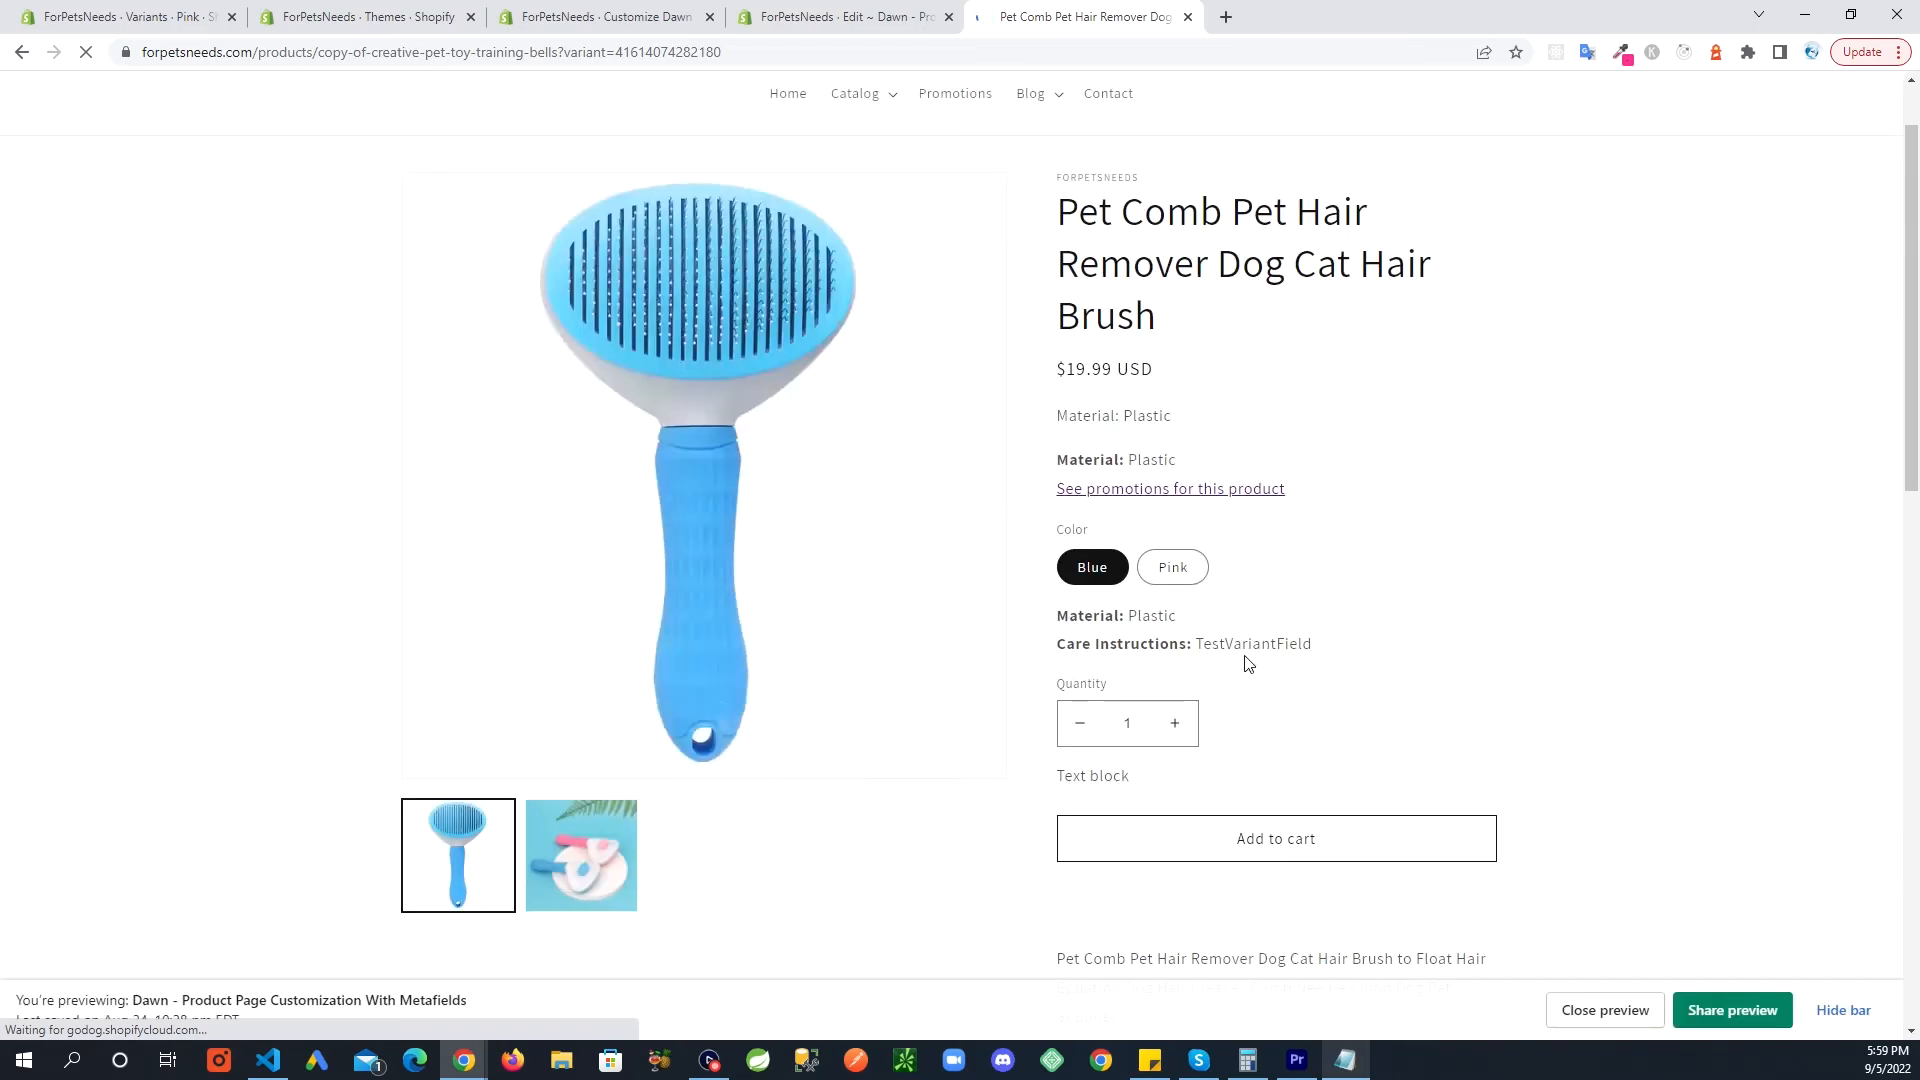
By following these steps, you can effectively add metafields to variants in Shopify and enhance your product pages with variant-specific data. This customization helps provide a better shopping experience for your customers by displaying relevant information for each variant.
